Monday, May 4, 2020

Coronavirus Clutter Cure
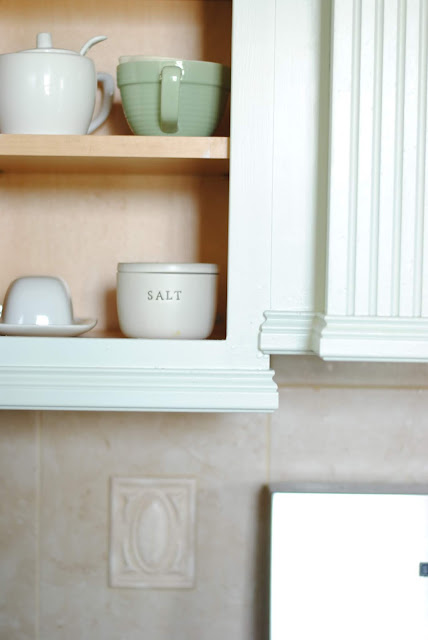
If you are like my family during coronavirus, you are feeling a little antsy and have a lot of pent up energy that isn't being expended in its usual ways.  We find our morning routines slowed way down, less rush, we often don't get out of our pajamas until 10 am (on particularly slow days we don't even change out of them). On bad weather days, after we have exhausted all the fun indoor activities, I find my kids pretty willing to do chores around the house as long as they are presented as a 'fun activity' and not a chore (I get it, I was young once too).


So I thought I'd use the same logic to trick myself into a 'chore' by trying to organize my kitchen cupboards and make it into a sorting game.  That might not sound like a ton of fun, but if you are a visual person like me, the visual calm you get from opening a well organized cupboard is so pleasing. It's the little things, haha.


A good place to start with organizing is to just take everything out (everything) and put into like categories. Next you figure out storage container options.  I pick up some mason jars at the thrift store a while back as well as some larger bulk item storage containers from The Container Store for things like rice/oatmeal/cereal/etc. Since we had been living in our current kitchen setup for a while, I had a pretty good idea of what worked and what didn't in terms of locations of items.  Spices, oven mitts, stirring spoons, etc all belonged over close to the stove, the snack cupboard needed to be accessible to the kids. All the baking stuff could be tucked away near the kitchen island, etc. Then once I figured out locations for things, I put them into the lidded jars and up on the shelves (more frequently used item being near the bottom, less frequently used item near the top).

This new organization has helped a lot with kitchen efficiency.  And it looks so much better than the cluttered, unorganized mess that was there before. Next thing on my list is to get a good label maker for all these bulk containers.

Monday, April 27, 2020

Kitchen Update: Dishwasher + Panel


My dishwasher broke about a week into the Coronavirus crisis and social distancing (ugh).  The dishwasher came with the house and it had been sub par pretty such ever since it conked out on me the morning of our first Thanksgiving in our house!  I have been able to repair it every time, but when it stopped working this time, I just could sense that it wasn't coming back to life with a good lump of cash invested in it. So we bit the bullet and ordered a new dishwasher and I could be more pleased with it. 

I intentionally ordered a panel-ready dishwasher after seeing a number of Instagram accounts I follow install one of their own to match the cabinetry.   With our kitchen being on the smaller side (it if great if only one person is in there, but get 2+ people or kids and it quickly gets out of hand), I thought having a panel that blended in with the rest of the cabinetry was worth the extra time and money. 

I ordered a cabinet front from Fast Cabinet Doors and got started!  I needed some additional lumber to attach to the back of the panel so it matched the cabinetry around my kitchen a bit better. I used an extra door handle so the handle matched the other cabinets (I'd love to eventually update the hardware, but that is for another day).

Overall I am really happy with it!  And it was another easy project and install, so win, win! Oh and the functioning dishwasher is a BIG improvement. 


I will eventually install a toe kick underneath the dishwasher so that it matches the surrounding cabinets, but that is a minor detail that isn't noticed, so it can wait a bit longer. 


I lucked out with how close a match this cabinet was with what already existed. There are some minor details that you notice close up, but otherwise, it blends in really well. 


Bathroom Peg Rail

Ever since I saw The Grit + Polish install some peg rails at their farmhouse (they have them in many locations), I knew this was likely the solution I was going to use for our powder room on the mail level. I have already decided I wanted some kind of shelf there for storage, but the shaker pegs were a welcome detail. The Grit + Polish tutorial seemed easy enough, so I went with it! Couldn't be happier with the result!


The shaker pegs were ordered off of Amazon, but everything else was from my local Ace hardware. So happy to be supporting local businesses right now!


The yellow wall color is Golden Bounty by Sherwin Williams.  I have it in another guest bedroom, its a wonderful shade of yellow (thought slightly hard to photograph accurately).


I plan to store handsoap tablets (I order mine from Blueland for an environmentally friendly alternative) in these thrifted wall baskets and also a broom/dustpan for easy access off of the kitchen.  


It's also a great place to display my artwork...nothing like a captive audience to admire your art ;)


Thursday, April 16, 2020

Kitchen Update

This was by far the biggest and most intimidating project I had done in this house but  I knew it was something I should do if I really wanted to make this house feel like a home to me.  I am a huge fan of white/bright kitchens and this kitchen was anything but white and anything but bright.   The dark cabinetry, while perhaps very nice quality, were just the absolute opposite of anything I would have chosen for this kitchen.  It felt like a cave every time I walked in, and with the high ceiling, but small footprint, it just felt like being enclosed in darkness.

So, with a very limited budget, I decided the best route was to paint the cupboards. I knew I wanted cupboards that were either blue or greenish, but it took me a while to land on the color.  I eventually chose Sea Salt by Benjamin Moore and I couldn't be happier with the color.  Eventually I would love to switch out the countertops for something lighter, maybe a creamy white quartz and install a farmhouse sink instead of the horrible design for a sink there currently.  It's two sinks, but both are just not a good size and created way more mess than necessary.


The process was simple enough, but took about two months, start to finish because I did it all in sections.  I used a foam roller and a tinted primer before doing two coats of Benjamin Moore advanced paint in Sea Salt. I am really happy overall with the result, I think if I had to do it all again, I would sand down the heavily used areas (spots around the door handles) because I have noticed some chipping there already. But, I do eventually plan on replacing and updating all the hardware, so I'll likely do touchups when I do that. 

The dream for this kitchen would be to eventually update the counters, backsplash and maybe remove some of the trim pieces...its just a little excessive for my taste. I have played around with the idea of painting the tile floors and backsplash...but I'm a little hesitant at this point to paint tile that is in a heavily trafficked area. 

A bigger, and probably never going to happen dream, would be to expand the kitchen footprint into the mudroom on the other side of the sink.  It could make a gorgeous kitchen/breakfast table area, but would require a lot more work and a lot more money. 

1885 House Mood Board

Once I had finished the living room, I fell into a little bit of rut in terms of inspiration for the rest of the house. I decided to create a mood board for the house, which is something I had never down before.   I thought it would bring me some clarity about what I have going on in the house already and where I might like to focus my attention next.


This isn't complete, but it is clarifying for me in terms of what colors are there, what colors to stay away from and which ones to incorporate. Also, at this point, I had ordered from fabric in the top right area from Rifle Paper Co and made plans to make curtains for the front window. There were red curtains and I just don't do red anywhere in my design decisions.  I think I have painted one surface red ever, and that was eventually changed to navy blue. So I knew the red had to go. 

Friday, April 3, 2020

Living Room Paint 3/4 wall

The living room as it currently stands is still very much in flux.  Almost all the furniture in there now is furniture we brought with us and is stuff that was given to us, so it is old.  BUT, I wanted to change a couple things about the space in the interim including the wall color.  I chose Quiet Mint by Sherwin Williams but chose to paint just the first 2/4-3/4 of the wall.  I thought this might make the space feel cozier, stunt the height of the 10 foot ceilings. I'm not sure if that is what it actually did, but I like it for now.
view from the living room looking into the dining room

I thrifted these lamps (left) as well as the matching end tables that double as storage

The curtains were left over fabric from a different project. I'm eventually going to replace them with a pull down shade.  I'm trying to avoid anything that takes away from the gorgeous window and trim. 

I added a knick knack shelf to store stray books and photo albums.
   My future plans included replacing the old couch (not pictured) and possibly updating the rug as well.   But for now, it works. We are saving up to do the third story, so all big purchases will have to wait til after that.

Tuesday, March 31, 2020

Wall Mural - In the Bleak Midwinter


I took a break from renovating rooms in the February after we moved in.  It was a particularly bad winter.  Very, very cold with a ton of snow.  So we were stuck inside quite a bit (it was just too cold to venture out for long). I needed a project to distract me and bring me joy, so this is what resulted!  I drew inspiration from my favorite illustrator/small business owner Anna Rifle Bond from Rifle Paper Co. I just love all of her stuff and color palette. If my budget were limitless, I would just own everything she ever made.

I used the same color I had in the library/office as the backdrop (Balmy Night) and went to town. It brings me joy each time I see it.

The process wasn't super involved.  I bought three paint sample size cans in red, blue and yellow and mixed the colors myself.  Eventually, once the kids playroom moves to the third story, I want to add some built in shelves on the left side wall, framing the window with a padded bench for seating.  the piano (which we will eventually purchase) will go on this wall, or to the right.  There is a fire place opposite this wall, which I'd love to put a few cozy chairs around and french door to close this room off.  It gets a lot of northern exposure light, just a beautiful room.

Monday, March 30, 2020

Library/Office Refresh


 This house has a really awesome library/office that used to be the formal dining room. The dining room was cut off from the kitchen when they converted the butlers pantry into a storage closet (and added stairs down to the basement - you used to only be able to enter through the bilco doors outside).  This room was lined almost floor to ceiling with built in shelving.  We quickly filled them with books and all my thrifting purchases for selling (I sell vintage baby/kid clothes and other knick knacks I find when I'm out thrifting.  Check out my Ebay and Instagram pages - busy_bab if you want to see what is currently for sale).

I knew I wanted to go darker in this room to offset all the light/bright in the living room (you access the office from the living room).  I wanted something really dark, a dark hue of blue/green.  Eventually I landed on this color, Balmy Night by Clark + Kensington.  It's quite dark, but, because I left the shelving all white, it doesn't feel at all cave-like.  I may, in fact, eventually paint the shelves as well for a bit more drama.


The color can look anywhere from navy to black to a dark teal.  The rug I bought on Amazon.  I didn't want anything too nice because this room doesn't get used too frequently and I was planning on punch a hole in it for the computer cables. 


The desk we used is actually from IKEA.  I want to eventually replace the table top with a single slab, live edge piece, but that is for a future date. The chairs were both thrifted.


The Before

Saturday, March 28, 2020

Dining Room Makeover

Before moving to Wisconsin, I had visited a little shop attached to a lumber yard in Michigan that was selling slabs of wood of various sizes.  In our old house we never had a large dining room table, we had all our meals around a smaller kitchen table, which worked well unless we had anyone over.  Seating became an issue even if one other person came over for a formal meal.

I knew once we moved to Wisconsin I wanted to invest in a good table and I LOVED the idea of making one myself, or at least finishing it.  So I found a company, Urban Wood Lab operated by Hoppe Tree Service that sold large slabs of urban trees cut down locally.  What a wonderful way to have a piece of Wisconsin history, an actual tree that grew up here!

I selected two slabs of ash and had then assemble the table top.  I would finish the table top surface and attach the legs myself. This kicked off the dining room renovation (scroll down to see the whole process and the before)


The After

The Before


Unfinished table top surface with legs attached.
I used Waterlox to seal the table top after sanding and the table legs were a custom order off of Esty.  


I was in a hurry to get some dining room chairs (my goal was the have the room assembled before Thanksgiving!). I ordered these green ones off of Wayfair.  Eventually I will find some that are more substantial/higher quality, but these looked great and work for us so far. The white head chairs were bought locally at a furniture store. 

I ordered the vintage rug from a place on Ebay (rugemporium240) on auction.  It is one of my favorite purchases and was very cheap for the size and look of the rug. 


And lastly, I painted the walls Woodsmoke by Sherwin Williams. A nice warm grey with a hint of green. 


Oh, and I was able to snag this deal on facebook marketplace as well.  A very hard working hutch that stores all the things that don't fit in out kitchen.  Really pleased with this purchase (that was half what I would have spent on it new). 

1885 House

When we first moved into our 1885 queen anne victorian in 2018, it was pretty much a blank slate full of character.  Aside from the projects that needed our attention (mainly fixing an issue with the chimney, which we knew about before purchasing), there wasn't much in the way of repair, so I went ahead and got started on choosing colors that were more to our (haha, my) taste. I also wanted to invest in a really good dining room table (we didn't even have one in our old house) so I figured I would start in the dining room and get going!

But first, a couple pictures to show just how 'blank slate' this house was.


The formal living room, which for now is our playroom.  Though I have dreams of enclosing the large opening with glass doors and making it a music room. 


This large opening would have glass doors if my plans come true. ;)

The family room, the center of the house, where we spend most of our time. 

View into the dining room.  I love the colored glass, but I'd love to somehow change the red.  I'm not a fan of red. 


the library/office which used to be the formal dining room (Do people still design formal dining rooms anymore?)

The now-formal dining room where I focused my energies when we first moved in.

I love the built in cabinets here!

And the dark cave of a kitchen...I had plans to change this color almost as soon as I laid eyes on it!

back entry mudroom/sunroom

front entry

master bedroom (yes that is our sink, it is tiny, but it works for us)

large guest bathroom (mostly used by our kids)

back yard (sadly the hot tub didn't work and we have plans to ditch it eventually)


Christmas Card 2023

 In an effort to be more environmentally friendly this year (and because we ran out of time to send anything before the New Year), we have t...